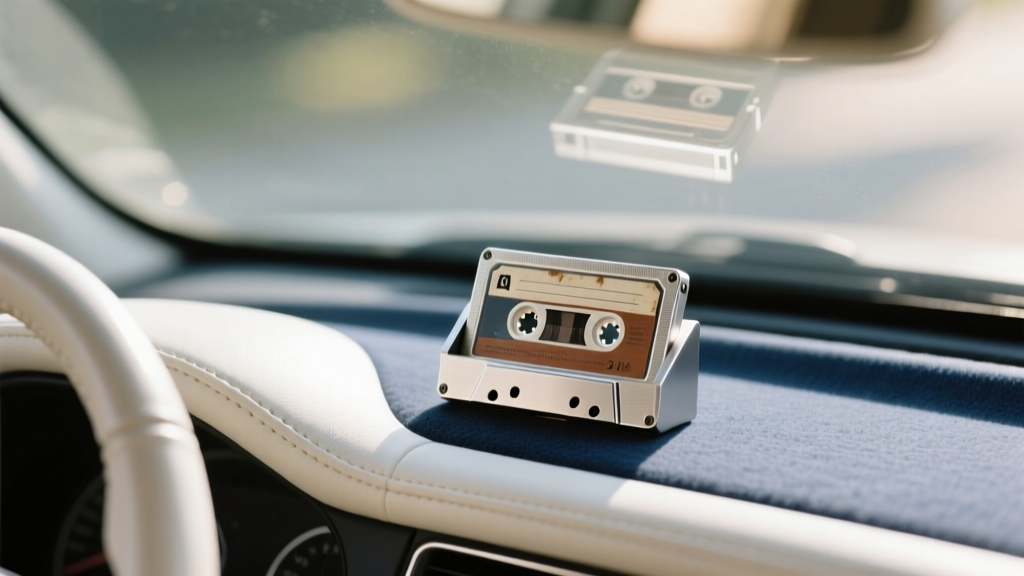
Cassette Tape Holder Care & Cleaning (2026)
Cassette tape holders are one of those classic car interior features that quietly do their job?until they don?t. Whether you?ve got a factory-installed cassette organizer in a 90s sedan, an aftermarket visor-mounted holder, or a center console cassette tray that now stores garage door openers and spare change, keeping it clean and functional makes your interior feel cared-for. A dirty or sticky cassette holder can snag tapes, scuff labels, and leave your cabin looking neglected, especially if it sits in a high-visibility spot like the dash or overhead console.
There?s also a preservation angle. Many cassette holders are made from aging plastics, vinyl, and foam inserts that get brittle in heat and UV exposure. Add years of skin oils, dust, spilled coffee, and interior dressing overspray, and you?ve got a recipe for cracked tabs, gummy residue, and warped compartments. A little routine cleaning and the right products can extend the life of these small interior components?and keep your retro audio setup looking the part.
This guide walks through safe, practical cleaning methods for the most common cassette tape holder styles, along with real-world tips, product recommendations, and common mistakes to avoid. The goal: a holder that looks original, works smoothly, and won?t damage your tapes.
Know Your Cassette Tape Holder Type (Cleaning Depends on It)
Before you grab a cleaner, identify what you?re dealing with. Cassette holders vary a lot by material and mounting location, and the wrong approach (especially with solvents) can haze plastics or dissolve adhesives.
Common styles you?ll see in cars
- Center console cassette tray: Usually rigid plastic with molded slots; may have a lid or spring-loaded door.
- Dash or radio-adjacent holder: Integrated into the dash trim or an OEM accessory insert; often textured plastic.
- Visor-mounted cassette holder: Vinyl-wrapped shell with elastic straps or clips; sometimes has foam-backed pockets.
- Seat-back or door-pocket cassette organizer: Soft organizer with stitched vinyl/cloth and elastic retention bands.
- Aftermarket ?cassette wallet? or flip-case: Plastic outer with felt/foam inserts.
Materials to watch
- ABS or polypropylene plastic: Durable, but can haze with harsh solvents.
- Vinyl/leatherette: Can dry out, crack, or get glossy with the wrong dressing.
- Foam inserts: Can crumble with age; may absorb liquids.
- Felt liners: Trap dust and lint; can hold odors.
- Adhesives (glued pads/liners): Can soften with heat or aggressive cleaners.
Tools and Supplies (What You Actually Need)
You don?t need a detail cart to do this well. The right basics prevent scratches and keep moisture out of places it shouldn?t go.
Core cleaning kit
- Microfiber cloths (at least 2?one for cleaning, one for drying/buffing)
- Soft interior detailing brush (or a clean, soft paintbrush)
- Cotton swabs for corners and tight cassette slots
- Vacuum with a soft brush attachment or handheld vacuum
- Compressed air (optional but helpful for deep slots)
- Mild all-purpose cleaner (APC) suitable for interiors or a dedicated interior cleaner
- Distilled water (reduces water spotting on glossy plastics)
Helpful extras (for specific issues)
- 70% isopropyl alcohol (spot use for sticky residue?test first)
- Plastic-safe protectant with a matte/satin finish (UV protection)
- Odor absorber (baking soda, charcoal pouch) for musty soft organizers
- Foam-safe fabric cleaner (for cloth/elastic organizers)
Step-by-Step: Routine Cleaning for a Hard Plastic Cassette Holder
This is the most common scenario: a molded plastic cassette tray in the console, dash, or an OEM accessory compartment.
1) Empty and inspect
- Remove all tapes and any loose items (coins, clips, receipts).
- Check for broken tabs, warped slots, sticky residue, and anything that could scrape a cassette shell.
- If the holder is near a drink holder, look for dried sugar or coffee?these create the ?sticky cassette? problem.
2) Dry clean first (avoid turning dust into grime)
- Vacuum the holder using a soft brush attachment.
- Use a detailing brush to agitate dust in corners and slot edges while vacuuming.
- Blow out stubborn debris with compressed air, keeping the nozzle a few inches away to avoid blasting dirt deeper.
3) Clean with a lightly dampened microfiber
- Spray cleaner onto the cloth?not directly into the holder.
- Wipe all exposed surfaces, following the texture direction if the plastic is grained.
- For cassette slots, wrap a cloth around a plastic trim tool or use cotton swabs to reach deep edges.
4) Address grime in seams and edges
- Use a soft brush with a tiny amount of cleaner to loosen buildup.
- Immediately wipe with a clean microfiber to lift residue.
- Repeat as needed?multiple gentle passes beat one aggressive scrub.
5) Dry and finish
- Buff dry with a separate microfiber to prevent streaking.
- If the holder sees sun exposure (dash/console), apply a matte UV protectant sparingly and buff to a natural finish.
Real-world example: If your console cassette tray feels tacky after years of interior dressing overspray, you?ll often need two rounds: first to remove surface dust, second to remove the oily film that keeps attracting more grime.
Step-by-Step: Cleaning a Vinyl or Visor-Mounted Cassette Holder
Soft holders can look great, but they?re more sensitive to soaking and they love to trap odors.
1) Remove it (when possible)
- Unclip or unstrap it from the visor/seat-back.
- Shake out loose debris outdoors.
2) Vacuum and brush
- Vacuum the pockets and seams.
- Use a soft brush to lift lint from stitching and edges.
3) Spot clean carefully
- Test cleaner on an inconspicuous area (inside edge or underside).
- Lightly mist the cloth (not the organizer), then wipe vinyl surfaces.
- For fabric/elastic sections, use a fabric-safe cleaner and blot?avoid saturating foam-backed areas.
4) Deodorize if needed
- Place the holder in a sealed bin or bag with a charcoal pouch overnight.
- For stubborn odors, sprinkle a small amount of baking soda into pockets, let sit for a few hours, then vacuum thoroughly.
5) Dry fully before reinstalling
- Air dry out of direct sun (sun can warp vinyl or weaken adhesives).
- Confirm it?s fully dry to prevent mildew, especially in humid climates.
Sticky Residue, Spills, and Mystery Gunk: Targeted Fixes
Older cassette holders often collect adhesive residue (old labels, tape, melted candy, or the remains of a foam pad). Here?s how to handle it without damaging plastics.
For sticky residue on plastic
- Start with warm water on a microfiber (just damp) and gentle rubbing.
- If residue remains, use a small amount of interior-safe APC on the cloth.
- As a last resort, use 70% isopropyl alcohol on a cotton swab for spot treatment.
- Wipe immediately with a damp cloth, then dry.
For sugary drink spills
- Use a damp microfiber with mild cleaner to dissolve sugar (sugar is water-soluble).
- Repeat until the surface no longer feels tacky.
- Dry thoroughly?leftover moisture pulls more dust and can create squeaks.
For crumbling foam inserts
- Vacuum gently with low suction to avoid tearing the remaining material.
- If foam is failing, consider removing and replacing it with thin felt (adhesive-backed) or leave it bare if it doesn?t affect tape retention.
- Avoid soaking?foam can break down faster when wet.
Product Recommendations (Safe Picks and When to Use Them)
The best cleaning products for cassette tape holder care are the same ones detailers trust for interior plastics and vinyl?gentle, residue-free, and UV-protective when needed.
Interior cleaners (good for routine cleaning)
- Dedicated interior cleaner (matte finish): Great for textured OEM plastics and console trays; minimal shine.
- APC diluted for interiors: Useful for heavier grime; always follow dilution guidelines and test first.
Protectants (for sun-exposed holders)
- Matte/satin UV protectant: Helps prevent fading and brittleness on dash-mounted holders.
- Avoid greasy ?wet look? dressings: They attract dust and can transfer to cassette labels and hands.
Residue removers (use cautiously)
- Isopropyl alcohol (70%): Effective for small sticky spots; can dull some plastics if overused.
- Citrus-based removers: Can work, but may soften plastics or leave an oily film?only use if labeled plastic-safe and always wipe clean afterward.
Quick comparison: Interior cleaner vs. APC
- Interior cleaner: Safer for frequent use, less likely to streak or discolor, typically leaves a factory-look finish.
- APC: Better for neglected grime, but easier to overdo; requires careful dilution and thorough wipe-down.
Common Mistakes to Avoid
- Spraying cleaner directly into slots: Liquid can pool under trim, soften adhesives, or drip into electronics nearby.
- Using harsh solvents (acetone, lacquer thinner, strong degreasers): These can haze, crack, or melt plastic.
- Over-scrubbing with stiff brushes: Leaves shiny spots on textured trim and can fray vinyl edges.
- Applying glossy dressing: Looks out of place on vintage interiors and makes surfaces dust-magnets.
- Ignoring drying time: Moisture trapped in soft organizers leads to mildew smells and staining.
- Storing dirty tapes back in a clean holder: Grimy cassette shells re-contaminate slots quickly and can cause sticking.
Maintenance Schedule: Keep It Clean Without Overthinking It
A little consistency beats the occasional deep clean. Here?s a simple cadence that works for most car owners.
- Every 2?4 weeks: Quick vacuum and wipe of exposed surfaces.
- Every 3?6 months: Deep clean slot edges, seams, and lid/hinge areas.
- Before/after summer: Apply UV protectant (especially for dash-mounted holders in hot climates).
- Anytime a spill happens: Clean immediately?sugar and dairy-based drinks get worse fast.
Extra Tips for Keeping Tapes and Holders in Good Shape
- Clean cassette shells too: Wipe the outside with a slightly damp microfiber to prevent grit from scratching the holder.
- Avoid heat baking: If your car sits in the sun, consider a windshield sunshade; it reduces plastic warping and adhesive failure.
- Check fitment: Some aftermarket holders are tight; forcing tapes in can snap retention tabs.
- Label carefully: Old paper labels can shed adhesive; use clean, quality labels or keep labels off if you?re preserving an OEM look.
FAQ: Cassette Tape Holder Care and Cleaning
How do I clean cassette slots without pushing dirt deeper?
Vacuum while brushing. Agitate dirt with a soft detailing brush and hold the vacuum nozzle close so debris is lifted out immediately. If needed, use compressed air in short bursts while vacuuming.
Can I use household glass cleaner on my cassette holder?
It?s not ideal. Many glass cleaners contain ammonia or strong detergents that can discolor or haze plastics over time. A dedicated interior cleaner or a properly diluted APC is a safer choice.
Why does my cassette holder feel sticky even after cleaning?
Usually it?s leftover dressing, spilled soda residue, or plasticizer migration from aging materials. Try a second cleaning pass with a slightly stronger (but interior-safe) cleaner, then wipe with a damp cloth and dry. For tiny sticky patches, spot-treat with 70% isopropyl alcohol after testing.
What?s the best way to clean a visor-mounted cassette holder without damaging it?
Remove it from the visor, vacuum first, then wipe vinyl with a cleaner applied to a cloth (not sprayed directly). For fabric or elastic pockets, use a fabric-safe cleaner and blot?don?t soak foam-backed areas.
Should I apply protectant to a cassette holder?
If the holder is exposed to sun (dash/upper console), a matte UV protectant helps prevent fading and brittleness. For console trays that stay shaded, regular cleaning is usually enough.
My foam insert is crumbling?can I repair it?
Often, yes. Gently remove loose foam and replace it with thin adhesive-backed felt or craft foam cut to size. Choose a low-odor adhesive and avoid thick padding that makes tapes too tight.
Next Steps: Keep the Retro Look Clean and Functional
Start with a quick win: empty your cassette holder, vacuum it, and do one careful wipe-down using a microfiber cloth and an interior-safe cleaner. If the holder is sun-exposed, add a light UV protectant buffed to a factory finish. Then set a simple maintenance rhythm?once a month is enough to keep dust, spills, and sticky buildup from taking over.
If you?re refreshing other small interior accessories (console organizers, dash trays, visor clips, vintage audio trim), explore more how-to guides and car interior care tips on carinteriormix.com.